ThePartyWorks.com - Birthday Party Supplies

Tuesday, October 04, 2011

Coolest Birthday Cakes - Casino Birthday Cake Designs

Had a tough time thinking of some of the coolest birthday cakes to make for mum-in-law's 84th birthday in August, which happens to fall on National Day of Singapore as well. Looked through various birthday cake designs and theme cakes and finally came up with a casino themed cake for her as she loves to go to the casino.

Instead of a poker cake, visualized a baccarat game where there was a tie as well as a pair and of course a winning hand!

Here is the preparation for the fondant birthday cake...

Started off with the playing cards.  Decided to do with the biggest cards in the pack which is the four aces...  This was quite a challenge as all the pieces had to be hand cut as I do not have any cutters for this.
Ace of Clubs and Hearts
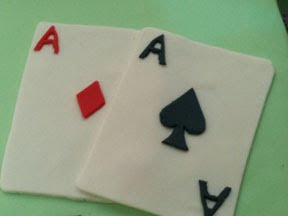
Ace of Diamonds and Spades
Next was the preparation of the casino chips.  Tried to get as close to the actual colours as I could.  As I did not have the correct mould cutters for this, had to make do with bottle covers, etc...
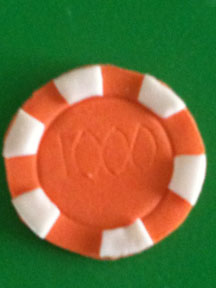
Casino Chips
Thought it came out pretty well, except that it was very time consuming, especially for the white edges.

Next was preparing the alphabets for the words, "PAIR" and "TIE".  This was to make it look just like the baccarat gaming table.

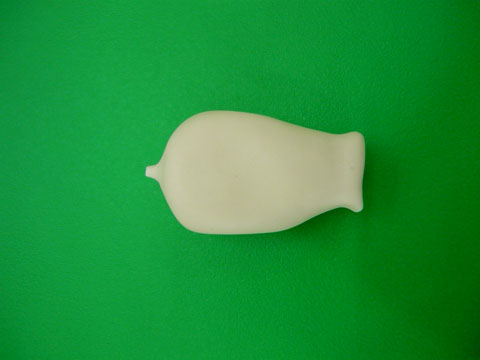
Now came time to bake the cake.  After baking the cake, covered it with a light green fondant base, followed by placing the designs that had been prepared.

Inserting the custom made casino fondant pieces
Stacking up the casino chips
More chips = more money
Design at side of cake

Some purple flowers to decorate the base

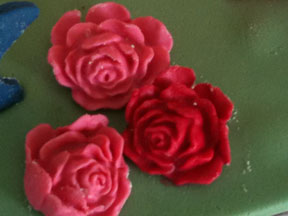
Some red roses as well
Finally, after a few hours, the cake was ready.  Here is a picture of the cake which I am proud of and I feel that this is one of the coolest birthday cakes that I have come up with on a full fondant birthday cake ...

The cake also has a winning hand!  Whoever bet on pairs and ties would have won!  At the same time, these wins are normally paid out 8:1 or greater...  :)  Which means even more money coming in at the casino.

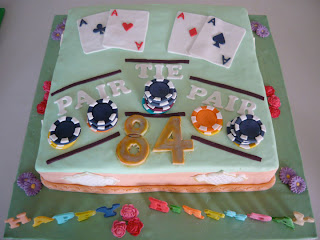
Final picture of the full fondant birthday cake - casino birthday cake designs
And time to sing Happy Birthday to the grand old dame...
Including the candles

Bookmark & Share

Wednesday, September 28, 2011

Baked Cheesecake Galore

WOW!  Over the last few months especially, I have been playing around with cheesecake recipes following some books and modifying some recipes.

Below are some of my trials with baked cheesecakes ...  :)

Mango cheesecake

Beer cheesecake - but not that much taste of beer & don't worry, you will not get drunk...  LOL

My favourite Durian cheesecake

Oreo cheesecake
Oreo cheeecake with chocolate topping

Double cheesecake

Pandan cheesecake

Chocolate chip cheesecake

Mango cheesecake (another variation)

Chocolate liquer cheesecake (was a little too rich for me)

Japanese cotton light cheesecake (have yet to master making this in a bigger pan)

Orange mascapone cheesecake

Marble cheesecake


Feather light cheesecake
New York cheesecake
I must admit that it was fun trying out the various baked cheesecake recipe and testing them out.  It was such a sense of satisfaction when it came out well...  :) & especially when getting compliments from others!  That indeed made the long hours in the kitchen worth it.


Bookmark & Share

Tuesday, September 27, 2011

Coolest Birthday Cakes - Mickey Mouse Cake

With tons of Mickey Clubhouse cakes on the net, my neighbour picked a few as samples for me to go by when making for her 2 year old daughter's birthday celebration.  This is one of the coolest birthday cakes and making use of the ever popular Mickey Mouse as the theme of the cake.  Note that this is not an original design.

In order to start getting the whole cake done up properly, three to four days in advance, I started preparing Mickey's head with black fondant mixed with gumpaste as I needed to get it to stand upright, and especially for the ears to stick on and not fall off.

Mickey's head was the last to be placed...

All the stars, hearts as well as alphabets had to be prepared in advance so that they would have time to harden and stand upright.  The flowers and leaves were fun to make as I started to visualize the cake with some colourful flowers and butterflies as well.

Mickey Mouse Cake - one of the coolest birthday cakes

 It was a joy to see such a cheerful Mickey Mouse cake, especially after days of planning...  The Mickey and friend figurines were purchased and provided by the customer.

The back of the  Mickey Clubhouse cake
Did not expect the pot of flowers which Minnie Mouse is standing on to give me a challenge, but had to re-do it as I found that it was difficult to get Minnie to stand up straight there and she kept leaning either forward or backward.  However, it all finally came together.  :)


ThePartyWorks.com - Birthday Party Supplies


Bookmark & Share

Tuesday, September 13, 2011

Snowskin Mooncake

Personally, I prefer the snowskin mooncake as compared to the traditional baked mooncakes. The snowskin mooncake is not only easy to make, yet it has a nice soft texture as well as comes in a kaleidoscope of colours and flavours. Best of all, it tastes pretty delicious!

Recently bought a set of mooncake moulds from Hong Kong during my recent trip there and here are some of the results...  :)  Prior to these new moulds, had made some snowskin mooncakes as well but forgotten to snap the pictures.

Pandan snowskin mooncake
Testing out my durian snowskin mooncake

Another of my trials - black sesame snowskin mooncake

Black sesame with lotus and durian snowskin mooncake

Green bean, red bean and the ever popular durian snowskin mooncakes


With the Mooncake Festival this year falling on 12th September, 2011, was too busy preparing the mooncakes and baking other goodies that this post just got updated after all the hectic schedule over the past few weeks.


Bookmark & Share

Sunday, July 31, 2011

Japanese Cotton Cheesecake Recipe

Japanese Cotton Cheesecake Recipe

Always love cakes that are light and fluffy.  Have been making cheesecakes recently and thought of trying out this Japanese Cheesecake Recipe.  The Japanese are well known for their cottony soft Cotton Cheesecake Recipe and fortunately for me, I found this recipe in one of my recipe books and modified it a little.

Baby Cotton Cheesecake Recipe

Japanese Cotton Cheesecake Recipe

Ingredients:-

A
200 g Cream cheese
30 g Butter
150 g Milk

B
50 g Flour
38 g Cornflour

C
5 Egg yolks

D
5 Egg whites
1/4 tsp Cream of tartar
100 g Sugar

Method:-

1  Place A in a mixing bowl.  Stir over double boiler until thicken.  Remove from heat.
2  Add in B and beat well.
3  Add in C one at a time and mix till well combined.
4  In a separate mixing bowl, whip D till soft peaks form.
5  Add D into cream cheese mixture and mix well.
6  Pour into 8 inches prepared baking tin.
7  Bake in steam bath 170 degrees C for approximately 45 minutes till a pick inserted into the centre comes out clean.
8  Remove cake from oven and unmould to cool.

Friday, June 17, 2011

Mini Fruit Tartlets Recipe

Love making these tiny fruit tartlets as they are easy to make and can just be popped into the mouth (though a little big still...  :}   ).  They are a big hit with adults and kids alike at parties!

I even have kids following this fruit tartlets recipe.

Personally, for the tart pastry,  I prefer to just buy these off the shelf as it does away with the hassle of doing up the shortcrust pastry.

In fact, the recipe for these mini fruit tartlets can be used for the normal fruit tart recipe with a little modification.  Just a matter of different size for the tart base, adding a little more custard and maybe cooking the filling till it thickens more so that it can be cut.


Mini Fruit Tartlets Recipe
(Makes 70)
Ingredients

A
500 g water
150 g sugar
50 g butter

B
50 g fresh milk
100 g custard powder
1 egg

C
Tartlet pastry shells

D
Fresh fruits, cut into bite-sized pieces

E (optional)
80 g water
1.5 tsp instant jelly


Method
1. Boil A
2. Mix B in a bowl and pour into A (away from fire). Cook over gentle fire until mixture thickens, whisking to prevent lumps.
3. Spoon into tartlet pastry shells.  If you are doing in bulk, it would be faster to  pipe the custard mixture into the pastry shells.

Custard mixture piped into the mini tartlet pastry
 4.  Decorate the tartlets with fruits as desired.

Adding the fruits

More colourful fruit tartlets

 5.  Dissolve instant jelly in water and bring to a boil.  Allow it to cool a little before glazing the fruits.


Glazed mini fruit tartlets

Glazing is optional and done only if you wish to have a glazed shiny look so that the fruits look nice and attractive.


Bookmark & Share

Thursday, June 16, 2011

How To Fondant Bride and Groom

During our PME Professional Diploma Course, we learned the principles of how to fondant cakes and figures.  On the last day of our 5-day course, we were taught the modeling techniques of a fondant bride and groom.

Although it took us beginners several hours to complete the modeling of the fondant bride and groom cake toppers, our instructor could do it in less than an hour.  WOW!  That goes to show how practice plays an important part in fondant modeling.

Here are some pictures taken as we were walked through the steps on modeling our fondant bride and groom cake toppers.

How to fondant bridegroom
Make 2 of these for the shoes

Roll black fondant to about 9 inches in length


Fold black fondant for the body and the legs, gluing in the centre

Cut a piece of white rectangle for the shirt

Putting the shirt on measuring the length of the shirt

 Trim the top of the shirt

 Neaten it

 Glue the shoes on and insert a skewer in through one leg all the way up

 Add some flesh coloured fondant around the top for the neck


 Cut a piece of black rectangle for the jacket


 Jacket fitting

 Trim to the correct size and round the corners

 Fitting the jacket

 Make a slit at the back

 Glue the jacket on

 Slit the top of the jacket for the collar and lapel

 Slit the other side as well

 Fold the jacket lapel and collar down

 To look like this

 Modeling the fingers

 Looks pretty real  :)

 Roll out black fondant for the jacket sleeves

 Add a white cuff on the wrist and slit as in picture above to slot the fingers into the black sleeve

 This is what it will look like

 Add in the head, eyes, nose, ears and make an indent for the mouth
How to fondant bride

1 Make the base of the bride as above... one is enough

2 Shape the upper body as in the picture

3 Pinch the top to form the neck

4 Trim the neck a little

5 Fit the upper body to the base and push a skewer through

6 Add the boobs
 7 Cut a white rectangle for the dress top

8 Trim for a low back dress

9 Design the front of the wedding dress

10 For a pleated skirt

11 One design of a wedding dress

12 For a short train

12 Fitting of the short train

14 Fitting of the head, arms and vase

15 For a long wedding train

16 Pleating the wedding train

17 Fitting the long wedding train to the bride

18 With the train flowing down the two tier wedding cake

19 Piping royal icing for the hair
Bride and groom cake toppers


More pictures of wedding cake toppers done by our group, though some are not fully completed.

Search Amazon.com for wedding cake toppers


Bookmark & Share